Inspection & Testing
Inspection & TestingNON-DESTRUCTIVE TESTING
At John Mayes, we regularly carry out various non-destructive tests on finished components or raw material when required.
Our unique relationship with a local NDT company enables us to have the majority of tests performed onsite. This enables us to ensure that lead times are affected as little as possible when testing is required. All tests are performed by a PCN Level II operator using Level 3 qualified procedures. These procedures are available for review and approval if required and they can also be supplied with an addendum to meet your specific project requirements.
All testing comes fully certified by the independent test house in accordance with strict acceptance criteria. When required these tests can be witnessed by a third party inspector (TPI) appointed by the client.
MAGNETIC PARTICLE INSPECTION (MPI)
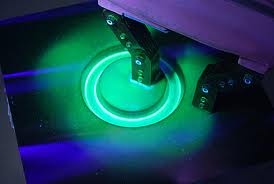
MPI testing is carried out on carbon steel or other ferromagnetic alloys. Surface and subsurface indications (flaws) are detected by applying ferrous iron particles and a magnet across the part being tested. A flaw in the material will disrupt the magnetic field created by the magnet and it is this disruption which attracts the ferrous iron particles. These particles are fluorescent when viewed under UV (ultraviolet) light and so highlights the flaw to the operator.
This test is most commonly applied to carbon steel welds but can also be used to test weld prep areas or non-welded fittings. MPI is preferred to DPI for carbon steels as MPI can reveal subsurface indications.
We carry out MPI testing using a magnetic yoke and a wet particle system.
Acceptance criteria - ASME SECT VIII APP 6.
DYE PENETRANT INSPECTION / LIQUID PENETRANT INSPECTION (DPI/LPI)
DPI testing is usually carried out on stainless steels or other non-ferromagnetic materials.
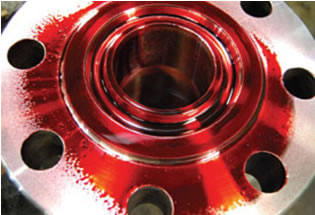
This test is based on capillary action to indicate surface breaking flaws. A low surface tension penetrant is applied to the part which enters any surface flaws or cracks. After a specific time has passed, excess penetrant is removed and a developer applied. The developer draws the penetrant out of the flaws which then makes them visible to the operator.
We carry out DPI testing using a visible penetrant and a white developer spray.
Acceptance criteria - ASME SECT VIII Div 1 APP 8.
X-RAY (RADIOGRAPHY)
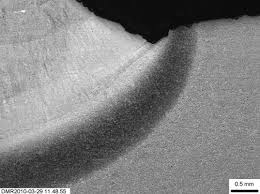
X-ray or radiography is the most stringent non-destructive test and is required where the welds must be of the utmost quality. We can offer x-ray testing on all materials with buttweld (BW) or full penetration welds. We have been passing x-ray weld examinations for years on our client’s welded components in materials ranging from A105/LF2 to Alloy 625.
Acceptance criteria - ASME SECT 8 DIV 1 UW51. Films will also be supplied.
ULTRASONIC
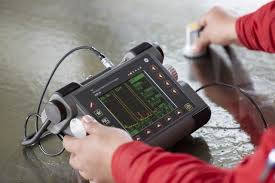
Ultrasonic testing is carried out to detect internal material flaws, usually at the raw material stage. Indications of a flaw are discovered by reflection of the ultrasound waves which are passed through a part. These reflections indicate the size and location of the flaw.
We carry out ultrasonic examination on raw materials such as flange forgings.
Acceptance criteria - ASME B16.34
NON-DESTRUCTIVE TESTING
At John Mayes, we regularly carry out various non-destructive tests on finished components or raw material when required.
Our unique relationship with a local NDT company enables us to have the majority of tests performed onsite. This enables us to ensure that lead times are affected as little as possible when testing is required. All tests are performed by a PCN Level II operator using Level 3 qualified procedures. These procedures are available for review and approval if required and they can also be supplied with an addendum to meet your specific project requirements.
All testing comes fully certified by the independent test house in accordance with strict acceptance criteria. When required these tests can be witnessed by a third party inspector (TPI) appointed by the client.
MAGNETIC PARTICLE INSPECTION (MPI)
MPI testing is carried out on carbon steel or other ferromagnetic alloys. Surface and subsurface indications (flaws) are detected by applying ferrous iron particles and a magnet across the part being tested. A flaw in the material will disrupt the magnetic field created by the magnet and it is this disruption which attracts the ferrous iron particles. These particles are fluorescent when viewed under UV (ultraviolet) light and so highlights the flaw to the operator.
This test is most commonly applied to carbon steel welds but can also be used to test weld prep areas or non-welded fittings. MPI is preferred to DPI for carbon steels as MPI can reveal subsurface indications.
We carry out MPI testing using a magnetic yoke and a wet particle system.
Acceptance criteria - ASME SECT VIII APP 6.
DYE PENETRANT INSPECTION / LIQUID PENETRANT INSPECTION (DPI/LPI)
DPI testing is usually carried out on stainless steels or other non-ferromagnetic materials.
This test is based on capillary action to indicate surface breaking flaws. A low surface tension penetrant is applied to the part which enters any surface flaws or cracks. After a specific time has passed, excess penetrant is removed and a developer applied. The developer draws the penetrant out of the flaws which then makes them visible to the operator.
We carry out DPI testing using a visible penetrant and a white developer spray.
Acceptance criteria - ASME SECT VIII Div 1 APP 8.
X-RAY (RADIOGRAPHY)
X-ray or radiography is the most stringent non-destructive test and is required where the welds must be of the utmost quality. We can offer x-ray testing on all materials with buttweld (BW) or full penetration welds. We have been passing x-ray weld examinations for years on our client’s welded components in materials ranging from A105/LF2 to Alloy 625.
Acceptance criteria - ASME SECT 8 DIV 1 UW51. Films will also be supplied.
ULTRASONIC
Ultrasonic testing is carried out to detect internal material flaws, usually at the raw material stage. Indications of a flaw are discovered by reflection of the ultrasound waves which are passed through a part. These reflections indicate the size and location of the flaw.
We carry out ultrasonic examination on raw materials such as flange forgings.
Acceptance criteria - ASME B16.34
|| Privacy Policy || Terms & Conditions || Returns & Refunds || Delivery || Contact Us ||
    |
|
COPYRIGHT © JOHN MAYES ENGINEERS / MAYES-UK |
|| Privacy Policy || Terms & Conditions || Returns & Refunds || Delivery || Contact Us ||
    |
|
COPYRIGHT © JOHN MAYES ENGINEERS / MAYES-UK |


